Lecture 6: Minting with the CLI and PAB
Plutus Pioneer Program - Cohort 3 February 26, 2022
Offical Video by Lars Brünjes: PPP-Cohort3-Lecture6
Google Doc version can be found HERE
Table of Contents
- Lecture 6: Minting with the CLI and PAB
- Table of Contents
- Preparation for Lecture 6
- Introduction
- The Minting Policy
- Minting with the CLI
- Deployment Scenarios
- The Contracts
- Minting with the PAB
- Homework
Preparation for Lecture 6
Before we can get started in lecture 6, we first must get our development environment up to date. You can copy and paste any of the code in this guide directly into your terminal or IDE.
First, head to the plutus-pioneer-program directory to grab the lecture week 6 contents. Execute:
You can now navigate to the current week06 directory and open the cabal.project file:
Grab the plutus-apps tag inside the cabal.project file:
location: https://github.com/input-output-hk/plutus-apps.git
  tag:6e3f6a59d64f6d4cd9d38bf263972adaf4f7b244
Head back to the plutus-apps directory and update it to the current git tag:
You should now be up to date and can run nix-shell in this directory. Run nix-shell:
Head back to the week06 folder to start running the cabal commands:
If successful, you should now see in the terminal:
Build profile: -w ghc-8.10.4.20210212 -O1
In order, the following will be built (use -v for more details):
 - plutus-pioneer-program-week06-0.1.0.0 (lib) (ephemeral targets)
Preprocessing library for plutus-pioneer-program-week06-0.1.0.0..
GHCi, version 8.10.4.20210212: https://www.haskell.org/ghc/  :? for help
Ok, six modules loaded.
Prelude Week06.Monitor>
Syncing the Node
Keep the cabal repl open on terminal 1, and open a new terminal 2. Head to the plutus-apps directory and first run nix-shell:
Head to week06 subfolder in the plutus pioneer directory. We will be running the start-node-test.sh script which will initialize the testnet based off of the config files in this folder
Terminal 2
[nix-shell:~/plutus-pioneer-program/code/week06]$
./start-testnet-node.sh

Output:
[penguin:cardano.node.ChainDB:Notice:34] [2022-02-22 14:23:14.33 UTC] Chain extended, new tip: 73912d4f092b24fcbb0b9f8f7e4668026ca91d6dba2b2758b62b704766e1faa7 at slot 51170578
Where start-testnet-node.sh looks like:
#!/bin/bash

cardano-node run \
    --config testnet/testnet-config.json \
    --topology testnet/testnet-topology.json \
    --database-path testnet/db \
    --socket-path testnet/node.sock \
    --port 3003
This process will take 5+ hours to sync. You will be 100% synced once you start seeing a new block every 20 seconds, rather than multiple blocks per second. Leave this terminal open and we can now get started with prepping for the PAB.
Wallet Backend Preparation
Keep the node running on terminal 2, and open a new terminal 3. Head to the plutus-apps directory and first run nix-shell:
Head to the week06 subfolder in the plutus pioneer directory, then inside that the testnet folder.
First, set the environment variables:
We will now start up start-testnet-wallet.sh:
Where start-testnet-wallet.sh looks like:
#!/bin/bash

cardano-wallet serve \
    --testnet testnet/testnet-byron-genesis.json \
    --node-socket $CARDANO_NODE_SOCKET_PATH
Wallet Creation:
Keep the wallet running on terminal 3, and open a new terminal 4. Head to the plutus-apps directory and first run nix-shell:
Head to week06 subfolder in the plutus pioneer directory. First, set the environment variables:
We will be running the create-wallet.sh script which will generate our wallet:
Terminal 4
[nix-shell:~/plutus-pioneer-program/code/week06]$
./create-wallet.sh YoroiWallet mysecretpassphrase testnet/restore-wallet.json

Output:
creating wallet with name YoroiWallet passphrase mysecretpassphrase
saved restoration file to testnet/restore-wallet.json
Where create-wallet.sh looks like:
#!/bin/bash

name=$1
passphrase=$2
file=$3
echo "creating wallet with name $name passphrase $passphrase"

phrase=$(cardano-wallet recovery-phrase generate)

x=''
sep=''
for word in $phrase
do
    x=$x$sep'"'$word'"'
    sep=', '
done

cat > $file <<- EOM
{ "name": "$name"
, "mnemonic_sentence": [$x]
, "passphrase": "$passphrase"
}
EOM
echo "saved restoration file to $file"
Looking at the wallet contents in the testnet folder:
Terminal 4
[nix-shell:~/plutus-pioneer-program/code/week06/testnet]$
cat restore-wallet.json

Output:
{ "name": "YoroiWallet"
, "mnemonic_sentence": ["pudding", "observe", "army", "rigid", "wise", "toward", "smart", "waste", "bomb", "alpha", "source", "ugly", "blouse", "trial", "job", "scheme", "easily", "baby", "scheme", "whip", "bike", "rain", "enhance", "leaf"]
, "passphrase": "mysecretpassphrase"
}
Yoroi Nightly Download - Google Chrome
Restore Wallet:
Select the Cardano Testnet:

Select 24 word seed phrase:

Input the seed phrase and enter a spending password to restore the wallet:
Use the receive address in the wallet to get funded from the Cardano Faucet:
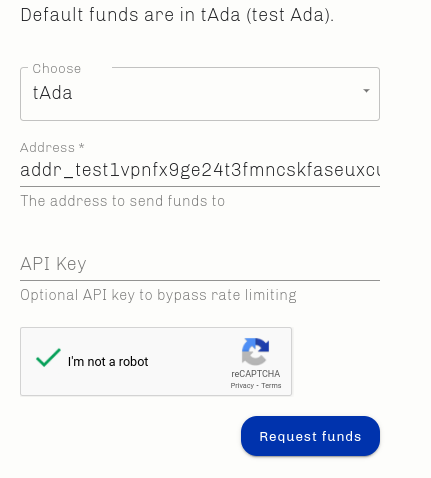
We now need to generate some ADA to send to our Yoroi address. This can be done from the following page using the Cardano faucet.
Load the wallet in the wallet backend:
Terminal 4
[nix-shell:~/plutus-pioneer-program/code/week06]$
./load-wallet.sh

Output:
{"balance":{"total":{"quantity":0,"unit":"lovelace"},"available":{"quantity":0,"unit":"lovelace"},"reward":{"quantity":0,"unit":"lovelace"}},"name":"YoroiWallet","id":"e698500d71c055b01c67ea06d3d3f0e08dcc6c3c","tip":{"height":{"quantity":0,"unit":"block"},"epoch_number":0,"time":"2019-07-24T20:20:16Z","absolute_slot_number":0,"slot_number":0},"passphrase":{"last_updated_at":"2022-03-02T18:56:56.341514606Z"},"address_pool_gap":20,"state":{"status":"syncing","progress":{"quantity":0,"unit":"percent"}},"delegation":{"next":[],"active":{"status":"not_delegating"}},"assets":{"total":[],"available":[]}}
Update env.sh replacing the wallet ID from the last step, and the address with the new Yoroi receive address:

Syncing the Chain Index
Keep the wallet running on terminal 4, and open a new terminal 5. Head to the plutus-apps directory and first run nix-shell:
To avoid future errors with the chain index, let’s install the dependencies:Head to week06 subfolder in the plutus pioneer directory. We will now sync the plutus-chain-index which will take a long time to sync:
Launching the PAB
Keep the chain index syncing on terminal 5, and open a new terminal 6. Head to the plutus-apps directory and first run nix-shell:
We first need to update the ./start-testnet-pab.sh script to handle the passphrase we picked for our wallet.Open ./start-testnet-pab.sh to update and save the passphrase:

Head to week06 subfolder in the plutus pioneer directory. We need to first create the initial config for the PAB:
We will now launch the PAB:
Keep this running as well and we can start the lecture! If your node is almost fully synced, you can edit testnet/pab-config.yml to bootstrap the PAB to your current node position:
developmentOptions:
  pabRollbackHistory: 1
  pabResumeFrom:
    # "tag" : "PointAtGenesis" }
      { "tag" : "Point"
      , "pointBlockId" : "b986b7fd42c6587030ff8af2b6867fcecf138eb6b08bd14989930573125f14d0"
      , "pointSlot" : {"getSlot" : 51463348}
      }
By replacing the blockid and slot with your current nodes position, it will bootstrap the PAB in line with your node.
We can also view the swagger ui for the PAB at:
Swagger UI - Browser Graphical Interface
Introduction
Welcome to the 6th lecture of the Plutus Pioneer Program. In this lecture we will get a complete overview of the Cardano testnet with and without the Plutus Application Backend (PAB). We will start with writing on-chain code, followed by off-chain code, and finally showing how to interact with that code on the Cardano testnet. In this iteration of the PPP, we have Plutus available on Cardano. Therefore, we can use the actual blockchain and show how to use the PAB to interact with contracts on the real Cardano testnet. We will be using the example of minting native tokens, and how to do so with and without the PAB backend.
The Minting Policy
Let's first look at the on-chain code, in the token folder for Onchain.hs.
module Week06.Token.OnChain
    ( tokenPolicy
    , tokenCurSymbol
    ) where

import qualified PlutusTx
import           PlutusTx.Prelude            hiding (Semigroup(..), unless)
import           Ledger                      hiding (mint, singleton)
import qualified Ledger.Typed.Scripts        as Scripts
import           Ledger.Value                as Value

{-# INLINABLE mkTokenPolicy #-}
mkTokenPolicy :: TxOutRef -> TokenName -> Integer -> () -> ScriptContext -> Bool
mkTokenPolicy oref tn amt () ctx = traceIfFalse "UTxO not consumed"   hasUTxO           &&
                                   traceIfFalse "wrong amount minted" checkMintedAmount
  where
    info :: TxInfo
    info = scriptContextTxInfo ctx

    hasUTxO :: Bool
    hasUTxO = any (\i -> txInInfoOutRef i == oref) $ txInfoInputs info

    checkMintedAmount :: Bool
    checkMintedAmount = case flattenValue (txInfoMint info) of
        [(_, tn', amt')] -> tn' == tn && amt' == amt
        _                -> False

tokenPolicy :: TxOutRef -> TokenName -> Integer -> Scripts.MintingPolicy
tokenPolicy oref tn amt = mkMintingPolicyScript $
    $$(PlutusTx.compile [|| \oref' tn' amt' -> Scripts.wrapMintingPolicy $ mkTokenPolicy oref' tn' amt' ||])
    `PlutusTx.applyCode`
    PlutusTx.liftCode oref
    `PlutusTx.applyCode`
    PlutusTx.liftCode tn
    `PlutusTx.applyCode`
    PlutusTx.liftCode amt

tokenCurSymbol :: TxOutRef -> TokenName -> Integer -> CurrencySymbol
tokenCurSymbol oref tn = scriptCurrencySymbol . tokenPolicy oref tn
So, looking at the three parameters for this minting policy:
- First, the TxOutRef, the reference to the UTxO that is to be consumed, spent by the minting transaction.
- Second, the TokenName.
- Third, the integer which is the amount of coins you want to mint.
- Forth, we don't need a redeemer, so that is type unit
- Fifth, the usual script context
- Last, the result is a bool
We then must check two conditions, namely that the specified UTxO has been spent and that the right amount has been minted.
mkTokenPolicy oref tn amt () ctx = traceIfFalse "UTxO not consumed"   hasUTxO         &&
                                   traceIfFalse "wrong amount minted" checkMintedAmount
checkMintedAmount :: Bool
    checkMintedAmount = case flattenValue (txInfoMint info) of
        [(_, tn', amt')] -> tn' == tn && amt' == amt
        _                -> False
tokenPolicy :: TxOutRef -> TokenName -> Integer -> Scripts.MintingPolicy
tokenPolicy oref tn amt = mkMintingPolicyScript $
    $$(PlutusTx.compile [|| \oref' tn' amt' -> Scripts.wrapMintingPolicy $ mkTokenPolicy oref' tn' amt' ||])
    `PlutusTx.applyCode`
    PlutusTx.liftCode oref
    `PlutusTx.applyCode`
    PlutusTx.liftCode tn
    `PlutusTx.applyCode`
    PlutusTx.liftCode amt
We have to lift the three parameters into Plutus and apply them to this compiled Plutus code to get our minting policy. And once we have that, we can also compute the corresponding currency symbol.
tokenCurSymbol :: TxOutRef -> TokenName -> Integer -> CurrencySymbol
tokenCurSymbol oref tn = scriptCurrencySymbol . tokenPolicy oref tn
So that's all, that's our on-chain code.
Minting with the CLI
We will now look at how you can use the Cardano-CLI; the Cardano command line interface, to mint tokens using the previous section's minting policy.
If you recall from lecture three, one of the things we need is the serialized script. In the case of lecture three, that was a Plutus validator. Now we have this minting policy:
newtype MintingPolicy
MintingPolicy is a wrapper around Scripts which are used as validators for minting constraints.
Constructors
MintingPolicy

getMintingPolicy :: Script
If we check in the haddock documentation, minting policy is a new type wrapper around the script. If you recall, validator was also just a new typewrapper around the script, however a different type of wrapper.
The representation is called script, which means serialization is very similar. Instead of having to first unwrap the validator constructor, now we must unwrap this minting policy constructor.
In the src folder there is a Haskell module called utils.hs that contains many utility functions that we will need later.
Including one in particular, writeMintingPolicy:
module Week06.Utils
    ( tryReadAddress, unsafeReadAddress
    , tryReadWalletId, unsafeReadWalletId
    , unsafeReadTxOutRef
    , writeJSON, writeUnit
    , contractActivationArgs
    , getCredentials, unsafePaymentPubKeyHash, unsafeStakePubKeyHash
    , cidToString
    , writeMintingPolicy
    , unsafeTokenNameToHex
    ) where
This is very similar to what was done in lecture three, for write validator. The exception now is it handles minting policies, so the code is almost identical.
Instead of a validator, it takes a minting policy:
writeMintingPolicy :: FilePath -> Plutus.MintingPolicy -> IO (Either (FileError ()) ())
writeMintingPolicy file = writeFileTextEnvelope @(PlutusScript PlutusScriptV1) file Nothing . PlutusScriptSerialised . SBS.toShort . LBS.toStrict . serialise . Plutus.getMintingPolicy
In this composition pipeline of functions, the very first step is getMintingPolicy. Instead of unwrapping the validator to get to the script, we unwrap the minting policy to get to a script. As soon as we have our minting policy, we can then use this function to serialize it to disk.
So now recall we need three parameters. We need :
- A reference to that UTxO that we want to consume
- The token name
- The amount
Using these three pieces of information we can use the function that we defined in the on-chain code TokenPolicy to calculate the policy, and then we can apply the function writeMintingPolicy to serialize and write it to our hard drive.
Now, in principle this is simple and straightforward. However in practice, we must somehow get those three parameters; especially the UTxO reference. Let's have a brief look at the haddock documentation for this type TxOutRef:
data TxOutRefSource#
A reference to a transaction output. This is a pair of a transaction reference, and an index indicating which of the outputs of that transaction we are referring to.
Constructors
TxOutRef

txOutRefId :: TxId
txOutRefIdx :: Integer Index into the referenced transaction's outputs
The record type with two fields TxId; transaction id and an integer. A UTxO is specified by a reference to the transaction that created it in the first place, which is the TxId.
Then an index, so each transaction has one or more outputs. Each transaction are numbered so they are ordered. This order of outputs of a transaction matters. The order of inputs does not matter, so that's unspecified. The outputs must be ordered, so they have well-defined indices.
By specifying this combination of producing transaction and index, we can specify which UTxO we are referring to.
If we look at TxID:
newtype TxId
A transaction ID, using a SHA256 hash as the transaction id.
Constructors
TxId

getTxId :: BuiltinByteString
This is a new type wrapper around a BuiltinByteString where BuiltinByteString is just a byte string; a new type wrapper around a byte string.
We can see that TxId implements isString:
In Haskell normally a string literal just represents a Haskell string, which is a list of characters. However, there are other string-like types in Haskell; for example text. This offers a more efficient implementation of textual data than string or byte string offers
And if we want to use string literals for those, then there is this language extension that we have often used called overloaded strings. This enables us to use string literals to also specify instances of different types, not just string.
Under the hood, the way it works is, with this class isString. isString has a method called fromString that goes from string to the typing question. So in particular whenever we see that some type has a string instance, then we could use a string literal in combination with the overloaded string extension to construct a value of this type. Programmatically we can use the fromString function to turn a string into this type.
The reason why this is important is because we must get our txoutref from somewhere. Now that we're using the Cardano CLI, we must retrieve it from the CLI since the CLI is a command line tool and works with strings in the console. We can query the UTxO sitting at the address, but then we just get a text output . We see the transaction id in this index and now we must take that text and convert it into an actual value of type txOutRef.
Now let's switch to the console. Keep the node running on terminal 2 (hopefully it is fully synced at this point), and open a new terminal. Head to the plutus-apps directory and first run nix-shell:
Head to the week06 subfolder in the plutus pioneer directory, then inside that the testnet folder. We first need to create a new vkey, skey pair:
Terminal 6

[nix-shell:~/plutus-pioneer-program/code/week06/testnet]$
cardano-cli address key-gen --verification-key-file 01.vkey --signing-key-file 01.skey
Followed by the address of the vkey:
Terminal 6
[nix-shell:~/plutus-pioneer-program/code/week06/testnet]$
cardano-cli address build --payment-verification-key-file 01.vkey --testnet-magic 1097911063 --out-file 01.addr
Terminal 6
[nix-shell:~/plutus-pioneer-program/code/week06/testnet]$
cat 01.addr

Output:
addr_test1vpnfx9ge24t3fmncskfaseuxcuvxhh0gh9dp3enr0qgk8xshq22j0
We now need to generate some ADA to send to our first address. This can be done from the following page using the Cardano faucet.
Important to note here, that your address for 01.addr will be different then address generated in this tutorial! Make sure you send the testnet ADA to the address you generated in the CLI!
Head to back up to the week06 subfolder in the plutus pioneer directory. Now we can query the address using the script query-key1.sh where query-key1.sh is:
Terminal 6
[nix-shell:~/plutus-pioneer-program/code/week06/testnet]$
cat query-key1.sh

Output:
#!/bin/bash

cardano-cli query utxo \
   $MAGIC \
   --address $(cat testnet/01.addr)
Terminal 6
[nix-shell:~/plutus-pioneer-program/code/week06/testnet]$
. env.sh

Output:
#!/bin/bash

export CARDANO_NODE_SOCKET_PATH=testnet/node.sock
export MAGIC='--testnet-magic 1097911063'
export ADDRESS=addr_test1qzj356wpdmhdchvmc355xx6wel7cqvepyrlam84aygkvx9d04w7v8cu4fshxvv5ukfw05nyzh07zy427mf2eqkcd27aqax2r7e
export WALLETID=7cc75497535877261173ab585f5abb431f7ba484
Execute env.sh:
Execute query-key1.sh:
Terminal 6
[nix-shell:~/plutus-pioneer-program/code/week06/testnet]$
./query-key1.sh

Output:
                           TxHash                                 TxIx        Amount
---------------------------------------------------------------------------
907591ea9aed646a647dfbcc216087c17adcc7f136ac2651c482dd5321c4f01d     0        1000000000 lovelace + TxOutDatumNone
As we can see, I have a single UTxO sitting at the address given by this key pair. Where the TxId is called TxHash, and the index is TxIx. The way this is normally represented in the Cardano-CLI is to take these two parts and separate them with a hash.
The corresponding UTxO would be this thing and then hash and then the index which is zero in this case. In order to turn this into a value of type txOutRef, we need to create a function .
Looking back on utils.hs, we can look closer at the function unsafeReadTxOutRef:
unsafeReadTxOutRef :: String -> Plutus.TxOutRef
unsafeReadTxOutRef s =
  let
    (x, _ : y) = span (/= '#') s
  in
    Plutus.TxOutRef
        { Plutus.txOutRefId  = fromString x
        , Plutus.txOutRefIdx = read y
        }
The unsafe part is used because something can go wrong and then you would get an error, so it's not a total function. However, if you provide sensible input it should be fine to run.
The span function comes from a data list and it gets a list and then splits that list into two parts. The first part consists of all the list elements where this condition is true. The second part covers the alternative case where the first character or the first element of the list where the condition becomes false.
In our case we are dealing with strings for a list of characters, this condition says not being the hash character. When we run span, then the x will be all the characters before the hash. Then, followed by the y and this will be the hash character and all the rest.
The underscore then because that will be the hash character and that is then everything behind the hash character.
Okay, so now we have these two pieces. Now we have to turn the x into a TxId and the y into an index and an integer. We can then use fromString applied to x to get the transaction id. In order to turn the y into an integer, we can use read
We can actually try it out in the repl. Load Utils.hs:
If we take TxHash and TxId from the address we queried, we get:
Prelude Week06.Utils> unsafeReadTxOutRef "907591ea9aed646a647dfbcc216087c17adcc7f136ac2651c482dd5321c4f01d#0"

Output:
TxOutRef {txOutRefId = 907591ea9aed646a647dfbcc216087c17adcc7f136ac2651c482dd5321c4f01d, txOutRefIdx = 0}
Then it works and we get something of type txOutRef.
Using this output, we can write a tool that allows us to serialize the correct minting policy. We can now look at token-policy.hs:
module Main
    ( main
    ) where

import Control.Exception    (throwIO)
import Data.String          (IsString (..))
import System.Environment   (getArgs)
import Week06.Token.OnChain (tokenPolicy)
import Week06.Utils         (unsafeReadTxOutRef, writeMintingPolicy)

main :: IO ()
main = do
    [file, oref', amt', tn'] <- getArgs
    let oref = unsafeReadTxOutRef oref'
        amt  = read amt'
        tn   = fromString tn'
        p    = tokenPolicy oref tn amt
    e <- writeMintingPolicy file p
    case e of
        Left err -> throwIO $ userError $ show err
        Right () -> return ()
First, get the four command line arguments.
It is done by the standard Haskell function getArgs.
- The first one is the file where I want to write the serialize minting policy too.
- Second one is the UTxO reference that we have been talking about now.
- Third being the amount of tokens to mint
- Fourth being the token name.
  let oref = unsafeReadTxOutRef oref'
        amt  = read amt'
        tn   = fromString tn'
        p    = tokenPolicy oref tn amt
    e <- writeMintingPolicy file p
- For the oref, the reference to the UTxO we use the unsafeReadTxOutRef that we just ran.
- The amount we can simply use read.
- The token name we can use
fromStringbecause token name also implements thesStringclass, similar toTxId.
Once we have these three pieces, we can apply the token policy function and call it p. We then can use the writeMintingPolicy function to write the serialized version of this minting policy a file.
We can try this out in nix-shell:
[nix-shell:~/plutus-pioneer-program/code/week06]$
cabal exec token-policy -- policy.plutus 907591ea9aed646a647dfbcc216087c17adcc7f136ac2651c482dd5321c4f01d#0 123456 PPP
Now if we look at this policy.plutus file, we do get the serialized version of a Plutus script. So that's the first part that we need.
[nix-shell:~/plutus-pioneer-program/code/week06]$
cat policy.plutus

Output:
{
    "type": "PlutusScriptV1",
    "description": "",
    "cborHex": "590a1c590a19010000333323322332233322233322232323233223232323233223232333222323332223233333333222222223232333322223232332232333222323232332233223232333332222233223322332233223322332233222223355048222323253353050330053333573466e1cd55ce9baa00448000811c8c98d4c118cd5ce0240238228221999ab9a3370e6aae754009200023300d32323232323232323232323333573466e1cd55cea805240004666666666603666a052464646666ae68cdc39aab9d5002480008cc084c0e4d5d0a80118171aba135744a004464c6a60ac66ae7016015c1541504d55cf280089baa00135742a01466a0520546ae854024ccd540c1d728179aba150083335503075ca05e6ae85401ccd40a40fcd5d0a80319a81499aa8280243ad35742a00a6464646666ae68cdc39aab9d5002480008cd408cc8c8c8cccd5cd19b8735573aa0049000119a81599a820bad35742a004608c6ae84d5d1280111931a982d19ab9c05c05b059058135573ca00226ea8004d5d0a8011919191999ab9a3370e6aae7540092000233502933504175a6ae854008c118d5d09aba25002232635305a3357380b80b60b20b026aae7940044dd50009aba135744a004464c6a60ac66ae7016015c1541504d55cf280089baa00135742a00866a052eb8d5d0a80199a81499aa8283ae200135742a00460706ae84d5d1280111931a982919ab9c054053051050135744a00226ae8940044d5d1280089aba25001135744a00226ae8940044d5d1280089aba25001135573ca00226ea8004d5d0a8011919191999ab9a3370ea002900311810181b9aba135573ca00646666ae68cdc3a801240084603e60826ae84d55cf280211999ab9a3370ea00690011180f98179aba135573ca00a46666ae68cdc3a80224000460446eb8d5d09aab9e5006232635304d33573809e09c09809609409209026aae7540044dd50009aba135744a004464c6a608c66ae7012011c11411041184c98d4c114cd5ce2490350543500046044135573ca00226ea800488c8d4c10c00ccc11ccc1192401115554784f206e6f7420636f6e73756d656400335504b33553048120013233504b2233353500a0032200200200135350080012200133500822533530500021052100104f2332253353051333573466e3cd4c0a800888008d4c0a80048800814c1484ccd5cd19b8735302a0022200135302a00122001053052105235300e001220020073235300c001222222222200a5001330464911377726f6e6720616d6f756e74206d696e74656400533535051323304d50540013235300c00122222222220075001104f22135355505800222253353505600413304c333573466e3c008028154150ccd5cd19b870010090550542210561353008001220021221233001003002120012212330010030022001222222222212333333333300100b00a00900800700600500400300220012212330010030022001122123300100300212001122123300100300212001122123300100300212001212222300400521222230030052122223002005212222300100520011232230023758002640026aa07e446666aae7c004940f48cd40f0c010d5d080118019aba200202d23232323333573466e1cd55cea801a4000466600e6464646666ae68cdc39aab9d5002480008cc034c0acd5d0a80119a8080139aba135744a004464c6a606266ae700cc0c80c00bc4d55cf280089baa00135742a006666aa016eb94028d5d0a80119a8063ae357426ae8940088c98d4c0b4cd5ce01781701601589aba25001135573ca00226ea800488848ccc00401000c00880048848cc00400c00880044cd54005d73ad112232230023756002640026aa07244646666aae7c008940e08cd40dccd540e8c018d55cea80118029aab9e500230043574400605026ae84004488c8c8cccd5cd19b875001480008d4020c014d5d09aab9e500323333573466e1d4009200225008232635302733573805205004c04a04826aae7540044dd5000890911801001889100089000919191999ab9a3370e6aae7540092000233006300735742a0046eb4d5d09aba25002232635302133573804604404003e26aae7940044dd500091091980080180110009191999ab9a3370e6aae75400520002375c6ae84d55cf280111931a980e99ab9c01f01e01c01b1375400224464646666ae68cdc3a800a40084a00e46666ae68cdc3a8012400446a014600c6ae84d55cf280211999ab9a3370ea00690001280511931a981019ab9c02202101f01e01d01c135573aa00226ea8004484888c00c0104488800844888004480048c8cccd5cd19b8750014800880908cccd5cd19b8750024800080908c98d4c060cd5ce00d00c80b80b00a89aab9d3754002464646464646666ae68cdc3a800a4018401646666ae68cdc3a80124014401a46666ae68cdc3a801a40104660166eb8d5d0a8029bad357426ae8940148cccd5cd19b875004480188cc034dd71aba15007375c6ae84d5d1280391999ab9a3370ea00a9002119809180a1aba15009375c6ae84d5d1280491999ab9a3370ea00c90011180a180a9aba135573ca01646666ae68cdc3a803a400046026602c6ae84d55cf280611931a981019ab9c02202101f01e01d01c01b01a019018135573aa00826aae79400c4d55cf280109aab9e500113754002424444444600e01044244444446600c012010424444444600a010244444440082444444400644244444446600401201044244444446600201201040024646464646666ae68cdc3a800a400446660106eb4d5d0a8021bad35742a0066eb4d5d09aba2500323333573466e1d400920002300a300b357426aae7940188c98d4c044cd5ce00980900800780709aab9d5003135744a00226aae7940044dd5000909118010019110911998008028020019000919191999ab9a3370ea0029001118031bae357426aae79400c8cccd5cd19b875002480008c020dd71aba135573ca008464c6a601666ae700340300280240204d55cea80089baa001212230020032122300100320011122232323333573466e1cd55cea80124000466aa034600c6ae854008c014d5d09aba25002232635300833573801401200e00c26aae7940044dd5000a4c2400240029210350543100225335300a001100c133573800401644a66a601200420022014640026aa0204422444a66a6a01c00226a6a00c00644002442666a6a01000a440046008004666aa600e2400200a00800224424660020060042400222446004002640026aa018444a66a6a01000220044426a6aa01a004446600e66601000400c002006640026aa0164444a66a6a01000220044426a6aa01a00444a66a6012666ae68cdc3800a4000016014266601000e00c006266601000e66a01a666aaa02400e00400200c0062440042440024002224400424424466002008006240022244246600200600422400222244424666002008006004222400222464600200244660066004004002664466004910120907591ea9aed646a647dfbcc216087c17adcc7f136ac2651c482dd5321c4f01d00480008848cc00400c00880052201035050500048202243c1"
}
In order to use the Cardano-CLI to mint tokens of this type, we need the policy script in serialized form. This was the hardest part. We should be able to do the minting using the CLI. We will now look at the script called mint-token-cli.sh.
#!/bin/bash

oref=$1
amt=$2
tn=$3
addrFile=$4
skeyFile=$5

echo "oref: $oref"
echo "amt: $amt"
echo "tn: $tn"
echo "address file: $addrFile"
echo "signing key file: $skeyFile"

ppFile=testnet/protocol-parameters.json
cardano-cli query protocol-parameters $MAGIC --out-file $ppFile

policyFile=testnet/token.plutus
cabal exec token-policy $policyFile $oref $amt $tn

unsignedFile=testnet/tx.unsigned
signedFile=testnet/tx.signed
pid=$(cardano-cli transaction policyid --script-file $policyFile)
tnHex=$(cabal exec token-name -- $tn)
addr=$(cat $addrFile)
v="$amt $pid.$tnHex"

echo "currency symbol: $pid"
echo "token name (hex): $tnHex"
echo "minted value: $v"
echo "address: $addr"

cardano-cli transaction build \
    $MAGIC \
    --tx-in $oref \
    --tx-in-collateral $oref \
    --tx-out "$addr + 1500000 lovelace + $v" \
    --mint "$v" \
    --mint-script-file $policyFile \
    --mint-redeemer-file testnet/unit.json \
    --change-address $addr \
    --protocol-params-file $ppFile \
    --out-file $unsignedFile \

cardano-cli transaction sign \
    --tx-body-file $unsignedFile \
    --signing-key-file $skeyFile \
    $MAGIC \
    --out-file $signedFile

cardano-cli transaction submit \
    $MAGIC \
    --tx-file $signedFile
It expects five command line parameters:
- The first is the UTxO reference that we also now just use to compute the minting policy.
- Second is the amount
- Third is the token name.
- Fourth is the name of the file containing the address, our own address which is used as a change address.
- Fifth is the name of the file containing the signing key, because we need to sign the transaction.
Then we log these parameters:
echo "oref: $oref"
echo "amt: $amt"
echo "tn: $tn"
echo "address file: $addrFile"
echo "signing key file: $skeyFile"
We then need to query the protocol parameters. It takes the magic and it takes an out file parameter to specify where to write these protocol parameters. Then, we write them to testnet/protocol-parameters.json:
ppFile=testnet/protocol-parameters.json
cardano-cli query protocol-parameters $MAGIC --out-file $ppFile
We then need the token policy. The filename used is testnet/token.plutus and then these three parameters we have from the parameters to this script.
Now, we need the policy id which is basically the hash of the policy.
We now have our policy file, we wrote that in this step, so now we can use this Cardano-CLI command to get the actual policy id and I assign it to this variable pid.
Now, there is one further complication. We want to mint the token in this example with the token name PPP. However, the Cardano-CLI does not understand these plain text token names. It looks for all the token names that are represented in hexadecimal. We need to convert this PPP to the correct hexadecimal representation
In Utils.hs:
unsafeTokenNameToHex :: TokenName -> String
unsafeTokenNameToHex = BS8.unpack . serialiseToRawBytesHex . fromJust . deserialiseFromRawBytes AsAssetName . getByteString . unTokenName
  where
    getByteString (BuiltinByteString bs) = bs
We first have to unwrap the token name, so the token name is just a new type wrapper around a BuiltinByteString.
Then we use a function from the Cardano API which is in the Haskell library that provides all the functionality that the Cardano-CLI uses to deserialize that into a so-called asset name. The asset name is the Cardano API type that corresponds to the Plutus token name type; in the Cardano API it's called asset name. Deserialize then returns a maybe type.
Then use another function from the Cardano API serializeToRawBytesHex to turn this into a hexadecimal byte string.
Finally, we turn the byte string into a string because we just want a string.
We can look at token-name.hs:
module Main
    ( main
    ) where

import Data.String        (IsString (..))
import System.Environment (getArgs)
import Week06.Utils       (unsafeTokenNameToHex)

main :: IO ()
main = do
    [tn'] <- getArgs
    let tn = fromString tn'
    putStrLn $ unsafeTokenNameToHex tn
This function just expects one argument, the token name. It then passes this token name prime, the string into an actual token name. Then it uses the function we just looked at, unsafeTokenNameToHex to produce the corresponding hexadecimal string.
We can test this out as well:
We can say cabal exec token-name and it takes the token name. If we use PPP as an example, then we see the corresponding token name that the Cardano-CLI understands is 505050.
Going back to our script:
-
We use this tool token-name to do just this to convert the token name that the user provides here as an argument and assign the result to variable
tnHex. -
Then address, we just read from the provided file name for the address.
-
The
vis the value that we want to mint.
And the representation that the cardano-cli uses for these things is, first the amount, then is a space and then, you specify the asset class by first giving the policy id then a dot and then the tokenname and that must be this hexadecimal token-name.
And now comes the transaction build command of the Cardano-CLI:
cardano-cli transaction build \
    $MAGIC \
    --tx-in $oref \
    --tx-in-collateral $oref \
    --tx-out "$addr + 1500000 lovelace + $v" \
    --mint "$v" \
    --mint-script-file $policyFile \
    --mint-redeemer-file testnet/unit.json \
    --change-address $addr \
    --protocol-params-file $ppFile \
    --out-file $unsignedFile \

cardano-cli transaction sign \
    --tx-body-file $unsignedFile \
    --signing-key-file $skeyFile \
    $MAGIC \
    --out-file $signedFile

cardano-cli transaction submit \
    $MAGIC \
    --tx-file $signedFile
It takes the magic, then inputs can be specified with tx-in. In this case, because it's just a public key input, we do not have to give a redeemer. So that's just our oref.
Now collateral. If people could for free send invalid transactions and keep the nodes occupied by running failing scripts, then that would slow down the network. Therefore there is a collateral mechanism, which says that every transaction which contains scripts, needs to specify a collateral where collateral must be a pub key input. It must only contain ADA, so no other native tokens. Under normal conditions, nothing will happen. If you just use the normal tools; the cardano node or the PAB for example, then the second phase will never fail and the collateral is ignored. However, if you do something fishy to circumvent these protections and the second phase of validation fails, then the collateral is forfeit. In which case you lose the collateral. In our case, because we have a minting policy that mustrun, we need to specify collateral. We can simply use the same oref, the same UTxO that we also use as input. Because that fulfills the criteria, it is a public key input and it only contains ADA.
We then specify an output. Normally that wouldn't be necessary, because the balancing would take care of that and just create a change output. However, change outputs only work in this version of the CLI for ADA, not formative tokens, so we explicitly create one. The address is the address we specified earlier, so our own address. This is followed by the value we want to mint, but there's also this thing of min ADA so each UTxO has to contain a minimal amount of ADA on top of any native tokens.
- The mint argument says how much the transaction should mint and that's exactly this
vvalue. - Mint expects the script file.
- Mint also expects a redeemer file. The redeemer, recall for this minting policy was just type unit. Therefore, we need unit represented as json.
- We must specify the change address, which is again our address
- Now, we need the protocol parameters, which we retrieved earlier .
- Lastly, we must say where to write the transaction to so this is an unsaved transaction. It will be balanced, but it won't be signed yet.
We then need to sign and submit the transaction.
cardano-cli transaction sign \
    --tx-body-file $unsignedFile \
    --signing-key-file $skeyFile \
    $MAGIC \
    --out-file $signedFile
- In order to sign, we have to specify where to find the unsigned one that we just created in the previous step.
- We must specify a file containing the signing key.
- Lastly, the network magic and a file where to write the sign file to.
And then finally submission:
- We need the network magic and the signed file.
We can now finally run the commands to mint out tokens in the CLI:
[nix-shell:~/plutus-pioneer-program/code/week06]$
./query-key1.sh

Output:
 TxHash                                 TxIx        Amount
---------------------------------------------------------------------------
907591ea9aed646a647dfbcc216087c17adcc7f136ac2651c482dd5321c4f01d     0        1000000000 lovelace + TxOutDatumNone
[nix-shell:~/plutus-pioneer-program/code/week06]$
./mint-token-cli.sh 907591ea9aed646a647dfbcc216087c17adcc7f136ac2651c482dd5321c4f01d#0 123456 PPP testnet/01.addr testnet/01.skey

Output:
oref: 907591ea9aed646a647dfbcc216087c17adcc7f136ac2651c482dd5321c4f01d#0
amt: 123456
tn: PPP
address file: testnet/01.addr
signing key file: testnet/01.skey
currency symbol: f0b752731b134cf2654347ccb7c1b050a16e0883cbe0b63235ea2f7f
token name (hex): 505050
minted value: 123456 f0b752731b134cf2654347ccb7c1b050a16e0883cbe0b63235ea2f7f.505050
address: addr_test1vpnfx9ge24t3fmncskfaseuxcuvxhh0gh9dp3enr0qgk8xshq22j0
Estimated transaction fee: Lovelace 343733
Transaction successfully submitted.
[nix-shell:~/plutus-pioneer-program/code/week06]$
./query-key1.sh

Output:
                          TxHash                                 TxIx        Amount
---------------------------------------------------------------------------
17ef5d0453991d380ec0b30d7678031f6cb3ef366950982d597d6c76ebbf6085     0        998156267 lovelace + TxOutDatumNone
17ef5d0453991d380ec0b30d7678031f6cb3ef366950982d597d6c76ebbf6085     1        1500000 lovelace + 123456 f0b752731b134cf2654347ccb7c1b050a16e0883cbe0b63235ea2f7f.505050 + TxOutDatumNone
Deployment Scenarios
Next, let's turn our attention to the PAB and see how we can accomplish what we did with the CLI using the PAB.
Looking at the haddock documentation for the PAB:
https://plutus-apps.readthedocs.io/en/latest/plutus/explanations/pab.html
We see that there are various deployment scenarios for the PAB. The one we will be looking at today, because it is already supported, is the hosted scenario or WBE.

-
The way it works is that on the server, which in this case is our local machine, we run a node.
-
Then in addition, we'll have to run a Cardano wallet backend. Which is the same backend that, for example, Daedalus wallet also uses.
-
Third, we have to run a so-called chain index.
-
Finally we have to run the PAB itself.
So the chain index is something like a lightweight version of db sync where db sync is a way to save the whole blockchain, all the information contained in the blockchain in an SQL database. The chain index is somewhat similar and it will allow us to do things like look up the datum belonging to a given datum hash.
The Cardano node is unable to do that on its own, as it validates transactions. At some point when, for example, the transaction tries to spend the script input, it has to provide the datum corresponding to the datum hash in the script output UTxO. At that point the node is aware of this datum, but then the node saves it to disk and forgets about it again. So we cannot use the node to look up this datum. The chain index can do this, and it can also answer other various queries. It is also dependent by the PAB.
The wallet can administer one or multiple wallets. These wallets are proper hd wallets, so you have a near infinity of potential addresses. Your public keys also get derived with each step, so you normally never use the same one again.
This hosted scenario means that we have to give the PAB full control over one or more of the wallets. The funds are handled by the wallet, so the wallet knows how to sign transactions. This means that we give the PAB access to that wallet; in other words, we give the spending password to the PAB.You can then interact with the PAB. The PAB has a web interface of http endpoints that are exposed. A DApp could interact with it by calling these endpoints.
However, this scenario is not very realistic in the real world, because it's quite unfortunate that you need to give control of the wallet to the PAB.So the way it could work is that the user that wants to interact with the dApp, that's written like this, would need to first transfer some funds to the server, to some wallet on the server and then the PAB does control those funds.
However, of course that is not very decentralized and is contrary to what DApps and blockchain are all about.
Alternatively, the user could run all these things himself. Running a node, a wallet, the backend, the chain index, and the PAB. Then it would be secure, but of course that means it can't be a browser-based dApp. Then it would be a bundle of applications that have to run on the user's machine. Those applications consume quite a lot of resources, including lots of memory and CPU.
So the really interesting scenario that unfortunately isn't supported yet, is the browser wallet scenario, where on the server side we only have the PAB, the chain index and the node, but not the wallet.

The PAB would create transactions, but it has no way to sign them itself, because it doesn't have access to a wallet. So instead it would expose the unsigned transactions on an endpoint. Then, from the browser or some other user interface, it could pick up this unsigned transaction and have it signed in the browser, using a browser wallet and then submit it. But at this point and time, this scenario is not fully supported. You can already do this with unbalanced transactions. For this to work properly, we have to wait until the PAB can balance and then only expose the balance transaction for signature.
Anyway, so we are concentrating now on this scenario, the hosted scenario.But in order to have anything for the PAB to do, we first need off chain code written in the contract monad, that the PAB can then execute, so let's look at that next.
The Contracts
Before we look at the actual contract, let's look at another helper function that is defined in Utils.hs called getCredentials.
getCredentials :: Plutus.Address -> Maybe (Plutus.PaymentPubKeyHash, Maybe Plutus.StakePubKeyHash)
getCredentials (Plutus.Address x y) = case x of
    ScriptCredential _   -> Nothing
    PubKeyCredential pkh ->
      let
        ppkh = Plutus.PaymentPubKeyHash pkh
      in
        case y of
            Nothing                        -> Just (ppkh, Nothing)
            Just (Plutus.StakingPtr _ _ _) -> Nothing
            Just (StakingHash h)           -> case h of
                ScriptCredential _    -> Nothing
                PubKeyCredential pkh' -> Just (ppkh, Just $ Plutus.StakePubKeyHash pkh')
It takes a Plutus address, and if we look at the definition of a Plutus address then we see that this is a record type with two fields.
data Address
Address with two kinds of credentials, normal and staking.
Constructors
Address

addressCredential :: Credential
addressStakingCredential :: Maybe StakingCredential
- The first address credential, which is the payment credential.
- The second address staking credential, which is the optional staking credential.
So for credential, there are two cases.
data Credential
Credential required to unlock a transaction output
Constructors
PubKeyCredential PubKeyHash
The transaction that spends this output must be signed by the private key
ScriptCredential ValidatorHash
The transaction that spends this output must include the validator script and be accepted by the validator.
- The first is a pub key credential, which is given by a pub key hash.
- The second one is a script credential, which is given by a validator hash.
These are the two cases of addresses, the ones that existed before Alonzo; just corresponding to pub keys. Also now, with the dawn of Plutus also those in which spending is controlled by a validator.
The staking credential, there are also two cases:
data StakingCredential
Staking credential used to assign rewards
Constructors

StakingHash Credential

StakingPtr Integer Integer Integer
- It can be a credential. In other words, a pub key hash or a validator script.
- Otherwise, it can be a pointer. There are these indirect staking credentials that point to a specific position on the blockchain.
Going back to Utils.hs, the helper function getCredentials is supposed to try to extract the public key hashes contained in the address.
getCredentials :: Plutus.Address -> Maybe (Plutus.PaymentPubKeyHash, Maybe Plutus.StakePubKeyHash)
getCredentials (Plutus.Address x y) = case x of
    ScriptCredential _   -> Nothing
    PubKeyCredential pkh ->
      let
        ppkh = Plutus.PaymentPubKeyHash pkh
      in
        case y of
            Nothing                        -> Just (ppkh, Nothing)
            Just (Plutus.StakingPtr _ _ _) -> Nothing
            Just (StakingHash h)           -> case h of
                ScriptCredential _    -> Nothing
                PubKeyCredential pkh' -> Just (ppkh, Just $ Plutus.StakePubKeyHash pkh')


  ScriptCredential _    -> Nothing
   PubKeyCredential pkh' -> Just (ppkh, Just $ Plutus.StakePubKeyHash pkh')
- The result will also be nothing if it's a script address.
- If it is not a script address, if it's a pub key address, then it will be a Just with the corresponding payment pub key hash. Also, optionally a staking pub key hash.
- If it's a pointer then the overall result will be nothing again.
Just (StakingHash h)           -> case h of
                ScriptCredential _    -> Nothing
                PubKeyCredential pkh' -> Just (ppkh, Just $ Plutus.StakePubKeyHash pkh')
- If it is staking hash, then again two cases
- If it is a script again the overall result will be nothing
- If it is a pub key then we return the corresponding stake pub key hash.
So, if any script is involved anywhere or if such a pointer is involved, then we return nothing. Otherwise we give the pub key hash and optionally, the stake hash.
We can now look at the module Token Offchain.hs.
data TokenParams = TokenParams
    { tpToken   :: !TokenName
    , tpAmount  :: !Integer
    , tpAddress :: !Address
    } deriving (Prelude.Eq, Prelude.Ord, Generic, FromJSON, ToJSON, ToSchema, Show)

adjustAndSubmitWith :: ( PlutusTx.FromData (Scripts.DatumType a)
                       , PlutusTx.ToData (Scripts.RedeemerType a)
                       , PlutusTx.ToData (Scripts.DatumType a)
                       , AsContractError e
                       )
                    => ScriptLookups a
                    -> TxConstraints (Scripts.RedeemerType a) (Scripts.DatumType a)
                    -> Contract w s e CardanoTx
adjustAndSubmitWith lookups constraints = do
    unbalanced <- adjustUnbalancedTx <$> mkTxConstraints lookups constraints
    Contract.logDebug @String $ printf "unbalanced: %s" $ show unbalanced
    unsigned <- balanceTx unbalanced
    Contract.logDebug @String $ printf "balanced: %s" $ show unsigned
    signed <- submitBalancedTx unsigned
    Contract.logDebug @String $ printf "signed: %s" $ show signed
    return signed

adjustAndSubmit :: ( PlutusTx.FromData (Scripts.DatumType a)
                   , PlutusTx.ToData (Scripts.RedeemerType a)
                   , PlutusTx.ToData (Scripts.DatumType a)
                   , AsContractError e
                   )
                => Scripts.TypedValidator a
                -> TxConstraints (Scripts.RedeemerType a) (Scripts.DatumType a)
                -> Contract w s e CardanoTx
adjustAndSubmit inst = adjustAndSubmitWith $ Constraints.typedValidatorLookups inst

mintToken :: TokenParams -> Contract w s Text CurrencySymbol
mintToken tp = do
    Contract.logDebug @String $ printf "started minting: %s" $ show tp
    let addr = tpAddress tp
    case getCredentials addr of
        Nothing      -> Contract.throwError $ pack $ printf "expected pubkey address, but got %s" $ show addr
        Just (x, my) -> do
            oref <- getUnspentOutput
            o    <- fromJust <$> Contract.txOutFromRef oref
            Contract.logDebug @String $ printf "picked UTxO at %s with value %s" (show oref) (show $ _ciTxOutValue o)

            let tn          = tpToken tp
                amt         = tpAmount tp
                cs          = tokenCurSymbol oref tn amt
                val         = Value.singleton cs tn amt
                c           = case my of
                    Nothing -> Constraints.mustPayToPubKey x val
                    Just y  -> Constraints.mustPayToPubKeyAddress x y val
                lookups     = Constraints.mintingPolicy (tokenPolicy oref tn amt) <>
                              Constraints.unspentOutputs (Map.singleton oref o)
                constraints = Constraints.mustMintValue val          <>
                              Constraints.mustSpendPubKeyOutput oref <>
                              c

            void $ adjustAndSubmitWith @Void lookups constraints
            Contract.logInfo @String $ printf "minted %s" (show val)
            return cs
This is where we define the minting of tokens in the contract monad. So first we define a type for the parameters.
data TokenParams = TokenParams
    { tpToken   :: !TokenName
    , tpAmount  :: !Integer
    , tpAddress :: !Address
    } deriving (Prelude.Eq, Prelude.Ord, Generic, FromJSON, ToJSON, ToSchema, Show)
This is very similar to what we also used in the Cardano-CLI. We need:
- The token name of the token to be minted
- The amount that will to be minted
- The address.
This is not the change address, it is instead the address where the tokens are supposed to be sent after the minting. We do that because now, we will be dealing with hd wallets. There are now infinitely many addresses that belong to a wallet, and we want to specify which one we want to use. It could also be external, and we could send the newly minted tokens to somebody else. We want to have control and specify that explicitly.
Looking at the main function:
mintToken :: TokenParams -> Contract w s Text CurrencySymbol
mintToken tp = do
    Contract.logDebug @String $ printf "started minting: %s" $ show tp
    let addr = tpAddress tp
    case getCredentials addr of
        Nothing      -> Contract.throwError $ pack $ printf "expected pubkey address, but got %s" $ show addr
        Just (x, my) -> do
            oref <- getUnspentOutput
            o    <- fromJust <$> Contract.txOutFromRef oref
            Contract.logDebug @String $ printf "picked UTxO at %s with value %s" (show oref) (show $ _ciTxOutValue o)

            let tn          = tpToken tp
                amt         = tpAmount tp
                cs          = tokenCurSymbol oref tn amt
                val         = Value.singleton cs tn amt
                c           = case my of
                    Nothing -> Constraints.mustPayToPubKey x val
                    Just y  -> Constraints.mustPayToPubKeyAddress x y val
                lookups     = Constraints.mintingPolicy (tokenPolicy oref tn amt) <>
                              Constraints.unspentOutputs (Map.singleton oref o)
                constraints = Constraints.mustMintValue val          <>
                              Constraints.mustSpendPubKeyOutput oref <>
                              c

            void $ adjustAndSubmitWith @Void lookups constraints
            Contract.logInfo @String $ printf "minted %s" (show val)
            return cs
- The
mintTokenfunction takes these token parameters and is a contract, an expression in the contract monad. - It will return the currency symbol.
mintToken tp = do
    Contract.logDebug @String $ printf "started minting: %s" $ show tp
    let addr = tpAddress tp
- We first log that we are starting to mint
- Second, we look up the address where we are supposed to send the minted token to.
Then we use the getCredentials function that we just looked at:
 case getCredentials addr of
        Nothing      -> Contract.throwError $ pack $ printf "expected pubkey address, but got %s" $ show addr
- If that returns nothing, that means there is a script somewhere in this address; it will stop with an error.
- If it is not nothing, we do have a payment pub key hash and have an optional staking pub key hash.
Then we use a function called getUnspentOutput
Just (x, my) -> do
            oref <- getUnspentOutput
            o    <- fromJust <$> Contract.txOutFromRef oref
            Contract.logDebug @String $ printf "picked UTxO at %s with value %s" (show oref) (show $ _ciTxOutValue o)
It does what it says, it looks for an unspent output in the wallet that is basically running this contract. We get a reference to this output. Then there is another function provided by the library called txOutFromRef.
Given such a reference, it gives us the actual output.This output could also fail, so it actually results in a maybe, but we know that the output is there because we just got this oref from this getUnspentOutput. We can be sure that there is an actual output there.
So, using fromJust from data.maybe, and fmapping that over this contract, we get the actual output.
We then log some information that we found in this unspent output, also looking up its value; so this output has a field ciTxOutValue.
Contract.logDebug @String $ printf "picked UTxO at %s with value %s" (show oref) (show $ _ciTxOutValue o)
Followed by a couple of helper definitions:
let tn          = tpToken tp
                amt         = tpAmount tp
                cs          = tokenCurSymbol oref tn amt
                val         = Value.singleton cs tn amt
- We first look up the token name from my parameters.
- Second, we look up the amount.
- Third, we compute the currency symbol. This comes from the on-chain part we looked at in the beginning. There we had a function
tokenPolicyto get the policy and also a functiontokenCurSymbolto get the currency symbol. Then we have this oref that we need as the first parameter and the token name and the amount. - So now we can finally compute the value that we want to mint. We can use the value singleton function; which takes the currency symbol that we now have, the token name, and the amount. Then it creates a value consisting of that.
Now, I want to have a constraint that says we want to pay this value to the given address:
 c           = case my of
                    Nothing -> Constraints.mustPayToPubKey x val
                    Just y  -> Constraints.mustPayToPubKeyAddress x y val
For the two cases whether staking information is present or not, there are two different constraints in the libraries.
- One is called
mustPayToPubKeyand it just takes a payment pub key. It will pay to the address where the staking information is non-existent. - The second if you want staking information, then you need a different constraint. This is called
mustPayToPubKeyAddress. This takes the two pub key hashes; one for the payment and one for the staking information.
For lookups, we must specify the minting policy.
 lookups     = Constraints.mintingPolicy (tokenPolicy oref tn amt) <>
                              Constraints.unspentOutputs (Map.singleton oref o)
So for that, we can use the tokenPolicy function from the on-chain part that we looked at earlier. We must specify, as before, the unspent outputs. So, we only need the one, so we can use map singleton. Creating a map with just one key and one value and use the oref and the o as value.
And then we can define our constraints:
So the last one here is the c, which says we want to pay the value to the provided address. Then we have a constraint to do the minting, so we want to mint this value. Therefore, we have a constraint that we need to spend thisoref.
This is important because the minting policy will check that this given oref’s actually spent by the transaction.
Now, we want to submit this. We defined a new helper function adjustAndSubmitWith so we can get more extensive logging:
adjustAndSubmitWith lookups constraints = do
    unbalanced <- adjustUnbalancedTx <$> mkTxConstraints lookups constraints
    Contract.logDebug @String $ printf "unbalanced: %s" $ show unbalanced
    unsigned <- balanceTx unbalanced
    Contract.logDebug @String $ printf "balanced: %s" $ show unsigned
    signed <- submitBalancedTx unsigned
    Contract.logDebug @String $ printf "signed: %s" $ show signed
    return signed
We can use something called adjustUnbalancedTx. This gets an unbalanced transaction, which we can make with the function mkTxConstraints, which takes lookups and constraints.
This will add the min ADA to all the outputs, so we still have an unbalanced transaction; however it at least fulfills this min ADA requirement. We then log the information for the unbalanced transaction.
Now we can balance it, using a new function balanceTx. We call the result unsigned, because now it's balanced, but unsigned. We also log the unsigned output.
Finally, there is the function submitBalancedTx. This takes a balanced unsigned transaction, signs it and submits it.This result we then call signed and log the output.
So we use adjustAndSubmitWith to actually adjust and balance and sign and submit the transaction:
 void $ adjustAndSubmitWith @Void lookups constraints
            Contract.logInfo @String $ printf "minted %s" (show val)
            return cs
We then log the information, and return.
So in particular, note that this contract only submits this one transaction and then stops.
We can test this using a simple emulator trace in the file Trace.hs.
testToken :: IO ()
testToken = runEmulatorTraceIO tokenTrace

tokenTrace :: EmulatorTrace ()
tokenTrace = do
    let w1 = knownWallet 1
    void $ activateContractWallet w1 $ void $ mintToken @() @Empty TokenParams
        { tpToken   = "USDT"
        , tpAmount  = 100_000
        , tpAddress = mockWalletAddress w1
        }
- For this wallet one, mintToken, we need to specify the w and the s parameters. In order to use it here in the emulator monad we must specify two specific types. So we choose type unit for the writer monad part, because we are not writing any information. We also use empty for the schema, so there are no endpoints.
- For the parameters, we just make up:
- A token name, so USDT in this case.
- An amount of 100,000.
- An address where we use wallet one's address.
Using the repl:
Prelude Week06.Trace> testToken

Output:

Wallet 872cb83b5ee40eb23bfdab1772660c822a48d491:
    {, ""}: 99996869
    {7aa78d513a7ecbffa84ff774c425bdbfa3207e469dde3ebaae7a97b9, "USDT"}: 100000
We see that indeed, we do end up with one wallet that now has 100000 USDTs.
Minting with the PAB
If you followed the guide up till now, hopefully the node, wallet backend, chain index, and PAB are fully synced from the work done in “preparation for lecture 6”.
Minting Tokens with Curl
We will first look at minting script using curl located at mint-token-curl.sh:
#!/bin/bash

amt=$1
tn=$2
echo "minting $1 coins of token $2"

pkh=$(cabal exec payment-key-hash -- $ADDRESS)
skh=$(cabal exec stake-key-hash -- $ADDRESS)
echo "payment key hash: $pkh"
echo "stake key hash: $skh"

curl -X 'POST' \
  'http://localhost:9080/api/contract/activate' \
  -H 'accept: application/json;charset=utf-8' \
  -H 'Content-Type: application/json;charset=utf-8' \
  -d '{
    "caWallet": {"getWalletId": "'"$WALLETID"'"},
    "caID": {
        "contents": {
            "tpToken": {"unTokenName": "'"$tn"'"},
            "tpAddress": {
                "addressCredential": {
                    "contents": {"getPubKeyHash": "'"$pkh"'"},
                    "tag": "PubKeyCredential"
                },
                "addressStakingCredential": {
                    "contents": {
                        "contents": {"getPubKeyHash": "'"$skh"'"},
                        "tag": "PubKeyCredential"
                    },
                    "tag": "StakingHash"
                }
            },
            "tpAmount": '"$amt"'
        },
        "tag": "Mint"
    }
}'
Now we want to use this script to mint tokens by activating this contract.
So the idea is, we give both the:
- Amount
- Token Name
Then do the appropriate curl. So one thing we need for this, is an address, the address where the freshly minted tokens should be sent to and also the change. We updated the environment variable env.sh file with the appropriate address in the “preparation for lecture 6” to handle this.
So we know where we get the address. In order to give this json expression for the token parameters, we need to present the address not in this string form that we just saw as the result of this get for address script.
We must give it in this Plutus form where the payment path and the staking path are separated. We saw earlier that we can extract the payment pubkeyhash and the stakekeyhash from an address. We use these functions called payment key hash and stake key hash.
We have our address and then I use the payment key hash tool with the address as parameter to get thepayment path and then the stake key hash tool with the address as parameter to get the staking path.
 "caWallet": {"getWalletId": "'"$WALLETID"'"},
    "caID": {
        "contents": {
            "tpToken": {"unTokenName": "'"$tn"'"},
            "tpAddress": {
                "addressCredential": {
                    "contents": {"getPubKeyHash": "'"$pkh"'"},
                    "tag": "PubKeyCredential"
                },
                "addressStakingCredential": {
                    "contents": {
                        "contents": {"getPubKeyHash": "'"$skh"'"},
                        "tag": "PubKeyCredential"
                    },
                    "tag": "StakingHash"
                }
            },
            "tpAmount": '"$amt"'
        },
        "tag": "Mint"
    }
}'
Here, we must put the wallet id, the token name, the payment path, the staking path of the address, and finally the amount.
So if we execute this, then that should work and we should be able to mint tokens for our wallet.
First, set the environment variables:
Mint the tokens using the ./mint-token-curl.sh script:
[nix-shell:~/plutus-pioneer-program/code/week06]$
./mint-token-curl.sh 123456 PPP

Output:
minting 123456 coins of token PPP
payment key hash: d1c79f02df9e00e87f5480fb2ca0bff2f2e088dff291353c00f3d121
stake key hash: f42afd0f3a849e19ffd104a9e8f25516be53afa40b0e51d276ae1521
{"unContractInstanceId":"ca93e73e-8350-42ba-82ca-303dad779804"}
So now we have achieved with the PAB what we achieved earlier with the CLI, minting tokens. There are pros and cons for both methods of course.
-
What is nice about the CLI method is that you only need a node. You neither need the wallet backend,the chain index, nor the PAB. The cons of it being that everything is text-based and we have to work quite hard to convert all the data types and get the correct values to fill in. We also manually had to look up the UTxO that we can use as input, so that we can successfully mint.
-
Using the contract monad and the PAB that was taken care of automatically, so we had to specify less. In the script here, all we had to do was give the amount and the token name.
Minting Tokens with Haskell
We will also look at a third way using haskell instead of curl to mint tokens utilizing the PAB. We will now look at mint-token.hs :
{-# LANGUAGE OverloadedStrings  #-}

module Main
    ( main
    ) where

import Control.Exception          (throwIO)
import Data.String                (IsString (..))
import Network.HTTP.Req
import System.Environment         (getArgs)
import Text.Printf                (printf)
import Wallet.Emulator.Wallet     (WalletId (..))
import Wallet.Types               (ContractInstanceId (..))
import Week06.PAB                 (TokenContracts (..))
import Week06.Token.OffChain      (TokenParams (..))
import Week06.Utils               (contractActivationArgs, unsafeReadAddress, unsafeReadWalletId)

main :: IO ()
main = do
    [amt', tn', wid', addr'] <- getArgs
    let wid = unsafeReadWalletId wid'
        tp  = TokenParams
                { tpToken   = fromString tn'
                , tpAmount  = read amt'
                , tpAddress = unsafeReadAddress addr'
                }
    printf "minting token for wallet id %s with parameters %s\n" (show wid) $ show tp
    cid <- mintToken wid tp
    printf "minted tokens, contract instance id: %s\n" $ show cid

mintToken :: WalletId -> TokenParams -> IO ContractInstanceId
mintToken wid tp = do
    v <- runReq defaultHttpConfig $ req
        POST
        (http "127.0.0.1" /: "api"  /: "contract" /: "activate")
        (ReqBodyJson $ contractActivationArgs wid $ Mint tp)
        jsonResponse
        (port 9080)
    let c = responseStatusCode v
    if c == 200
        then return $ responseBody v
        else throwIO $ userError $ printf "ERROR: %d\n" c
Here we are using a Haskell library from hackage called Req, which is a simple http client library:
So basically, instead of using curl, we can use Haskell using this request. For example in this script:
 v <- runReq defaultHttpConfig $ req
        POST
        (http "127.0.0.1" /: "api"  /: "contract" /: "activate")
        (ReqBodyJson $ contractActivationArgs wid $ Mint tp)
        jsonResponse
        (port 9080)
If we use Haskell, it is much easier to write the same function.
The way this function works is it takes four parameters:
- The amount
- The token name
- The wallet id
- The address
Then we have to pass them into the appropriate types. This is also in this Utils.hs module, so they have something called unsafeReadWalletId. This converts the string into an actual wallet id.
let wid = unsafeReadWalletId wid'
        tp  = TokenParams
                { tpToken   = fromString tn'
                , tpAmount  = read amt'
                , tpAddress = unsafeReadAddress addr'
                }
We then have unsafeReadAddress that takes an address and converts it into an actual address. We simply define our tp, the token parameters with token amount and address.
Then we call this mintToken function. That will take the valid id token parameters.
 v <- runReq defaultHttpConfig $ req
        POST
        (http "127.0.0.1" /: "api"  /: "contract" /: "activate")
        (ReqBodyJson $ contractActivationArgs wid $ Mint tp)
        jsonResponse
        (port 9080)
Then we can do our http request, so this comes from the req module. We specify the path, which is also quite nice the syntax here. Then we give the request body by simply using another helper function, that's also in this Utils.hs module.
contractActivationArgs :: WalletId -> a -> ContractActivationArgs a
contractActivationArgs wid a = ContractActivationArgs
    { caID = a
    , caWallet = Just $ Wallet {getWalletId = wid}
    }
So given a wallet id and something of type a, we get a so-called ContractActivationArgs a, which is exactly what this endpoint expects.
This is just a record type that has two fields.
- First is this
caIDfield - Second is the
caWalletfield
Given the wallet id, we can make a wallet out of that and specify that there as well.
We use that helper function here, to construct the json request body. We will be expecting a response on port 9080. This response is then defined as v.
 let c = responseStatusCode v
    if c == 200
        then return $ responseBody v
        else throwIO $ userError $ printf "ERROR: %d\n" c
We can extract the status code:
- 200 means everything went well.
- Otherwise we can throw an exception.
If it is 200, we return the response body, which will now be of the appropriate type, so of type contract instance id.
We can now look a a shell script called mint-token-haskell.sh that will make use of mint-token as we have just seen:
#!/bin/bash

amt=$1
tn=$2
echo "minting $1 coins of token $2"

cabal run mint-token -- $1 $2 $WALLETID $ADDRESS
This script takes as command line parameters of:
- The amount
- The token name
It fills in the wallet id and the address from these environment variables.
Looking in the terminal to run the script:
First, set the environment variables:
Mint the tokens using the ./mint-token-haskell.sh script:
[nix-shell:~/plutus-pioneer-program/code/week06]$
./mint-token-haskell.sh 1000000 Gold

Output:
Up to date
minting token for wallet id d06f7ba2a8de05f20d628819782f85e4c880d537 with parameters TokenParams {tpToken = "Gold", tpAmount = 1000000, tpAddress = Address {addressCredential = PubKeyCredential d1c79f02df9e00e87f5480fb2ca0bff2f2e088dff291353c00f3d121, addressStakingCredential = Just (StakingHash (PubKeyCredential f42afd0f3a849e19ffd104a9e8f25516be53afa40b0e51d276ae1521))}}
minted tokens, contract instance id: ContractInstanceId {unContractInstanceId = 6a9606ae-b696-4fb3-9c2b-6da0e8c856f1}

Wallet Monitoring
We will now look at one more contract, the monitor.hs contract:
main :: IO ()
main = do
    [wid', addr'] <- getArgs
    let wid  = unsafeReadWalletId wid'
        addr = unsafeReadAddress addr'
    printf "monitoring address %s on wallet %s\n" (show addr) $ show wid
    cid <- startMonitor wid addr
    printf "started monitor-process with contract id %s\n\n" $ cidToString cid
    go cid mempty
  where
    go :: ContractInstanceId -> Value -> IO a
    go cid v = do
        cic <- getMonitorState cid
        let v' = fromMaybe v $ observedValue cic
        when (v' /= v) $
            printf "%s\n\n" $ show $ flattenValue v'
        threadDelay 1_000_000
        go cid v'

startMonitor :: WalletId -> Address -> IO ContractInstanceId
startMonitor wid addr = do
    v <- runReq defaultHttpConfig $ req
        POST
        (http "127.0.0.1" /: "api"  /: "contract" /: "activate")
        (ReqBodyJson $ contractActivationArgs wid $ Monitor addr)
        jsonResponse
        (port 9080)
    let c = responseStatusCode v
    when (c /= 200) $
        throwIO $ userError $ printf "ERROR: %d\n" c
    return $ responseBody v

getMonitorState :: ContractInstanceId -> IO (ContractInstanceClientState TokenContracts)
getMonitorState cid = do
    v <- runReq defaultHttpConfig $ req
        GET
        (http "127.0.0.1" /: "api"  /: "contract" /: "instance" /: pack (cidToString cid) /: "status")
        NoReqBody
        jsonResponse
        (port 9080)
    let c = responseStatusCode v
    when (c /= 200) $
        throwIO $ userError $ printf "ERROR: %d\n" c
    return $ responseBody v

observedValue :: ContractInstanceClientState TokenContracts -> Maybe Value
observedValue cic = do
    Last mv <- parseMaybe parseJSON $ observableState $ cicCurrentState cic
    mv
We expect two command line arguments, just the wallet id and the address.
let wid  = unsafeReadWalletId wid'
        addr = unsafeReadAddress addr'
    printf "monitoring address %s on wallet %s\n" (show addr) $ show wid
    cid <- startMonitor wid addr
    printf "started monitor-process with contract id %s\n\n" $ cidToString cid
    go cid mempty
startMonitor :: WalletId -> Address -> IO ContractInstanceId
startMonitor wid addr = do
    v <- runReq defaultHttpConfig $ req
        POST
        (http "127.0.0.1" /: "api"  /: "contract" /: "activate")
        (ReqBodyJson $ contractActivationArgs wid $ Monitor addr)
        jsonResponse
        (port 9080)
    let c = responseStatusCode v
    when (c /= 200) $
        throwIO $ userError $ printf "ERROR: %d\n" c
    return $ responseBody v
contractActivationArgs again with the wallet id. However, now the argument is not mint token parameters, but monitor address instead.
We can expect a json response and it's again port 9080. We can check whether the status is 200 and we return this response body of the response, which is the contract instance id.
We can now look at the script monitor.sh to execute monitor.hs:
Looking in the terminal to run the script:
First, set the environment variables:
[nix-shell:~/plutus-pioneer-program/code/week06]$
./monitor.sh

Output:
monitoring address Address {addressCredential = PubKeyCredential d1c79f02df9e00e87f5480fb2ca0bff2f2e088dff291353c00f3d121, addressStakingCredential = Just (StakingHash (PubKeyCredential f42afd0f3a849e19ffd104a9e8f25516be53afa40b0e51d276ae1521))} on wallet d06f7ba2a8de05f20d628819782f85e4c880d537
started monitor-process with contract id 157159ff-5a30-48d6-b420-ef3670d187bb

[(ea4dbbf670b62ec4b430c97a8ec386eb712c3c57333daacccc534b28,"PPP",123456),(9a633180c8d3c3778d4af21d9e4b7936b7c08c8a1a73eb90177fb87d,"PPP",123456),(2b306c9b91e1fefd6ec74e02b3348981f26ebd9e908b74313b9ad3fe,"Gold",1000000),(,"",6000000)]
Homework
The objective of the homework this week is to get familiar with running the PAB environment and playing around with the CLI. If you have been following the guide up to this point, we should now have the essentials to mint tokens on the Cardano testnet with and without the PAB.